Creating an Azure Service Bus and Sending a Queue Message
Part 1 of the series: Create an Azure Service Bus, Create a Queue, and Deliver the First Message!
Engineering leader specializing in distributed event driven architectures, with a proven track record of building and mentoring high performing teams. My core expertise lies in dotnet/C#, modern messaging platforms, and Microsoft Azure, where I've architected and implemented highly scalable and available solutions. Explore my insights and deep dives into event driven architecture, patterns, and practices on my platform https://concurrentflows.com/.
Having led engineering teams in collaborative and remote-first environments, I prioritize mentorship, clear communication, and aligning technical roadmaps with stakeholder needs. My leadership foundation was strengthened through experience as a Sergeant in the U.S. Marine Corps, where I honed skills in team building and operational excellence.
Service Bus Series Kickoff!!!!
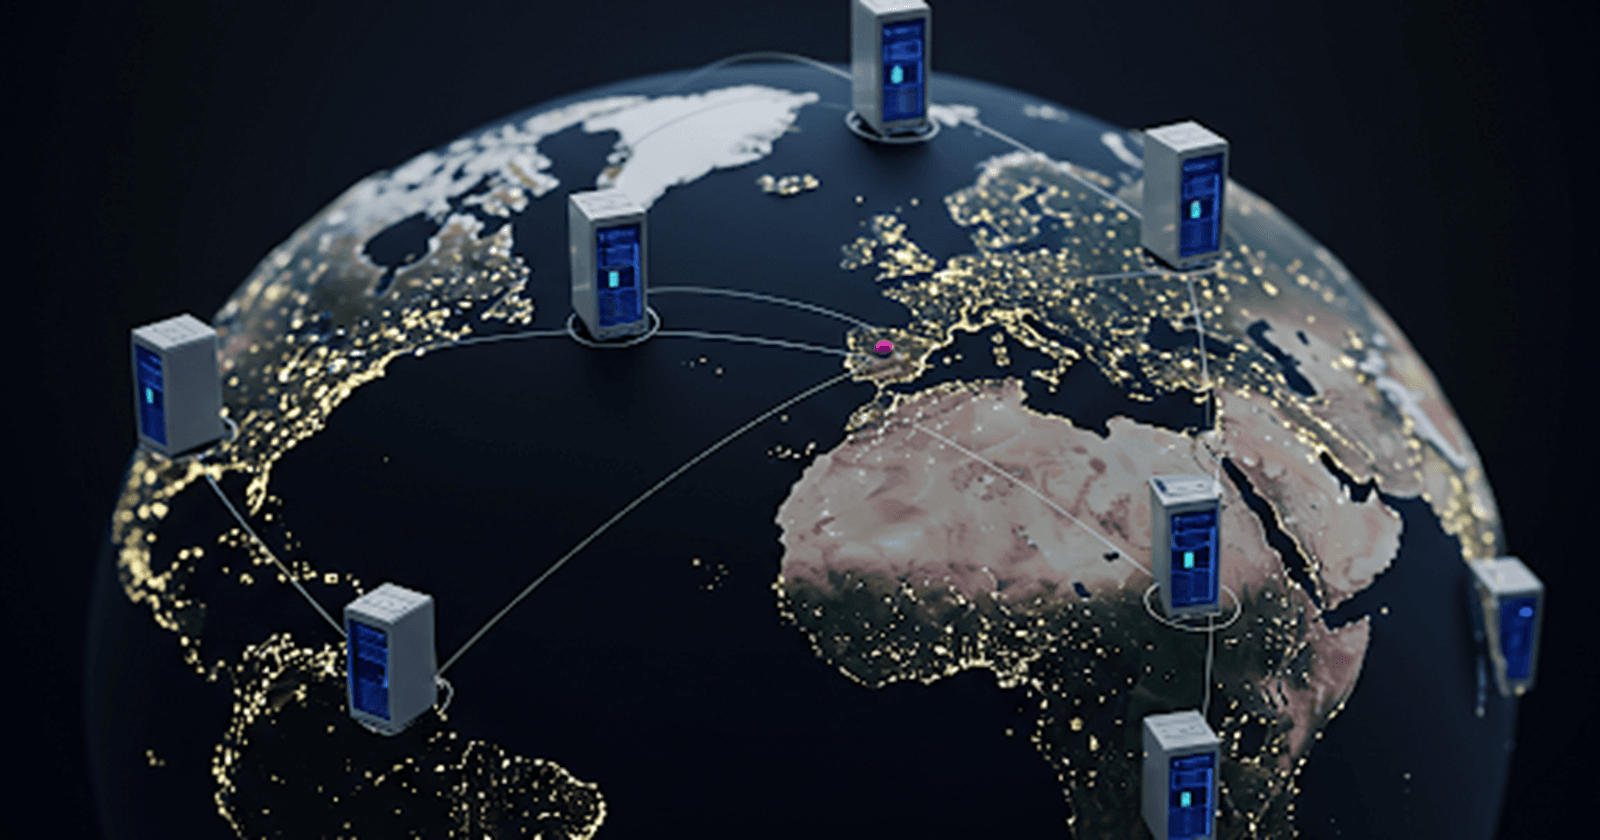
Welcome to my Azure Service Bus series! In this series we'll explore the widely used Azure Service Bus message broker, look at its features and capabilities, and how you can best leverage it in your projects.
My inspiration for this series came from the realization that while Service Bus is widely used in Azure/dotnet shops, there's not a lot of in-depth info and/or what's available is widely spread out and difficult to piece together. Many tutorials stop well short of the coolest features and capabilities that make Service Bus a great choice if you're working in Azure. Come on, why should Kafka get all the love?? 💘
Create the Service Bus
Within Azure everything is a Resource, and a 'Service Bus' takes the form of a Service Bus Namespace. This is essentially where you will send messages that ultimately get delivered to a Queue, Topic/Subscription.
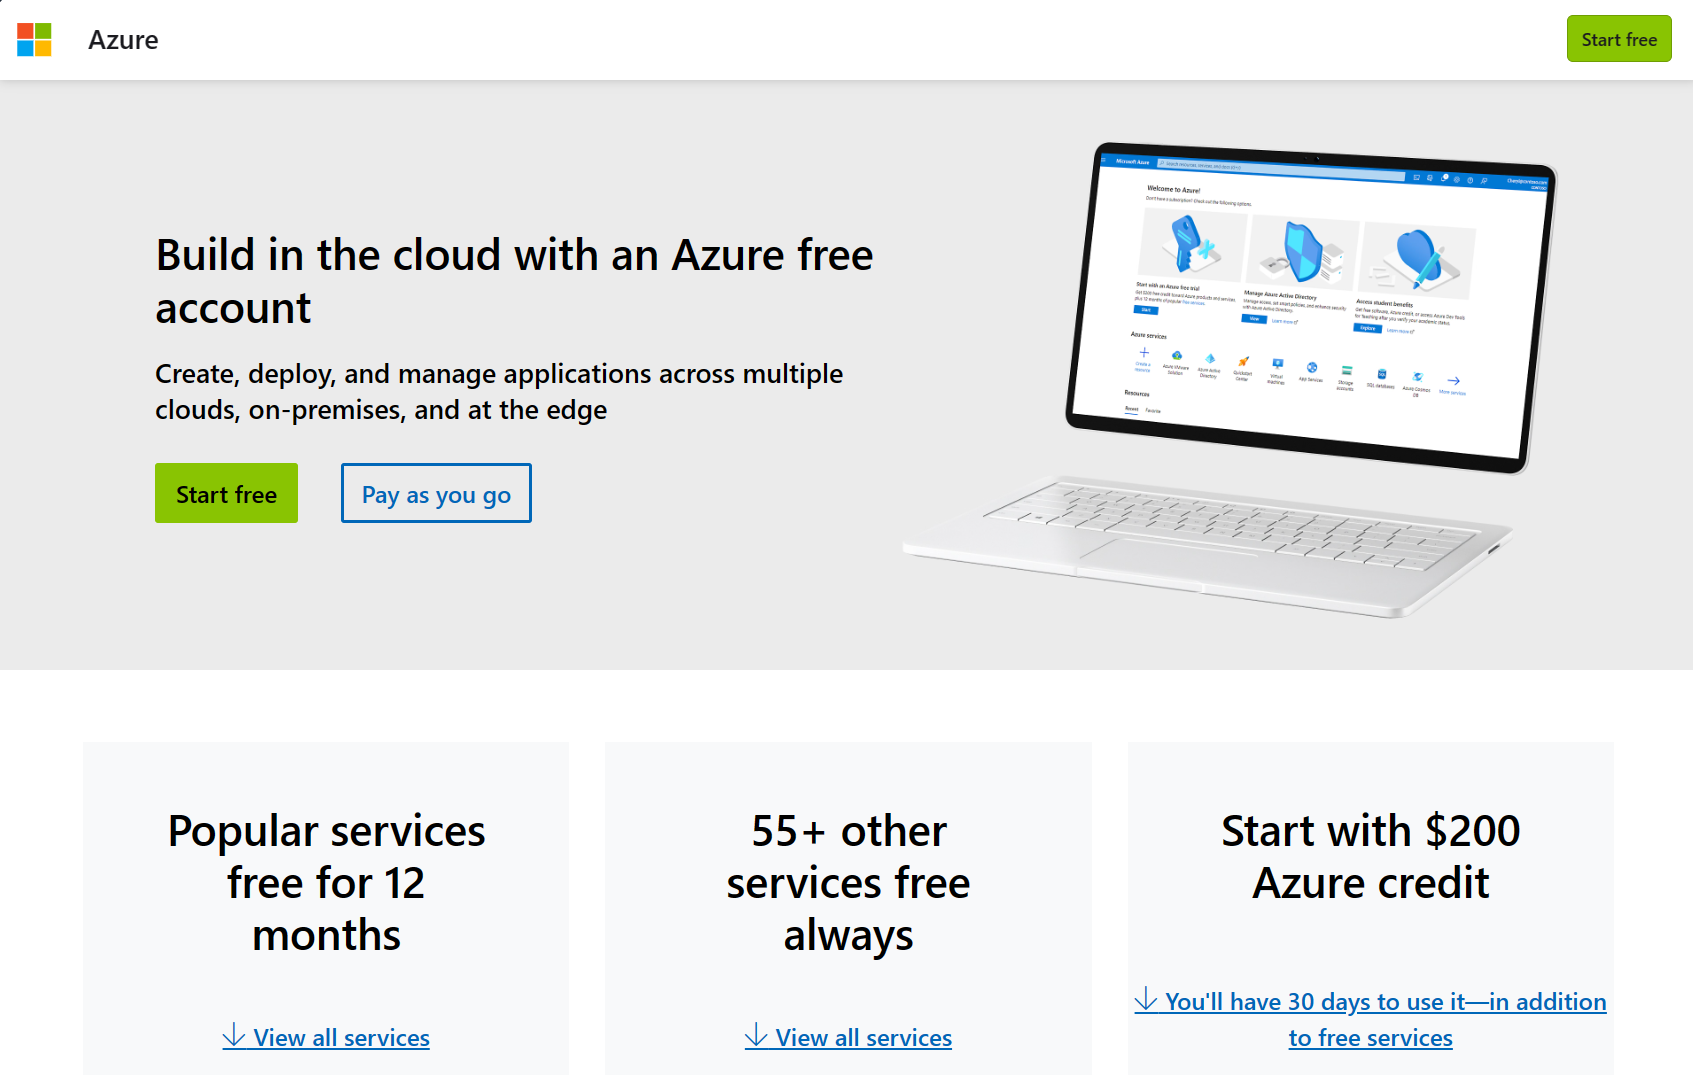
To create the Service Bus Namespace from the portal, first log into your account and/or start your free trial here ⇒ Azure Free Account
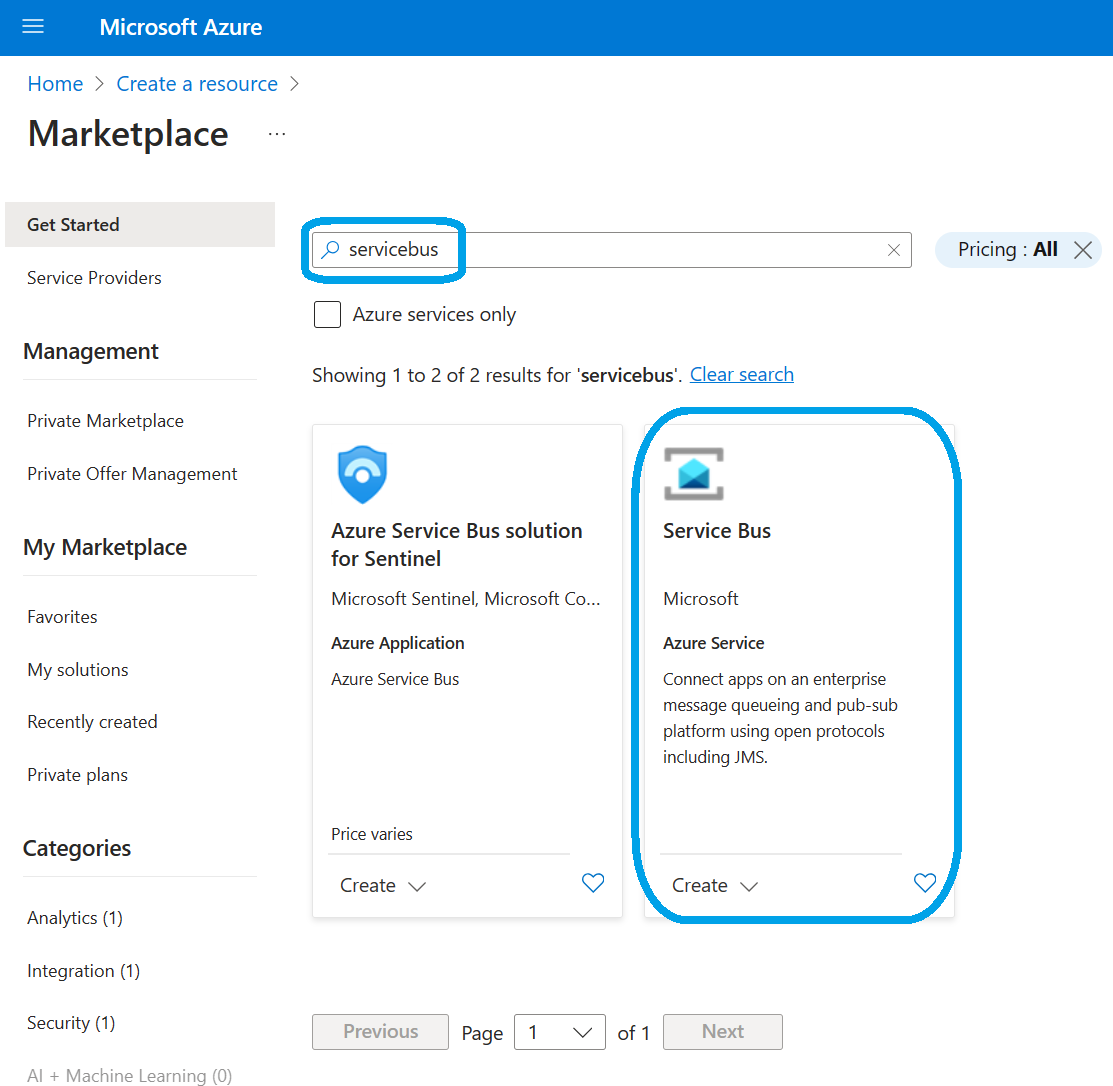
Once you're into the portal, simply search for 'Service Bus' in the marketplace:
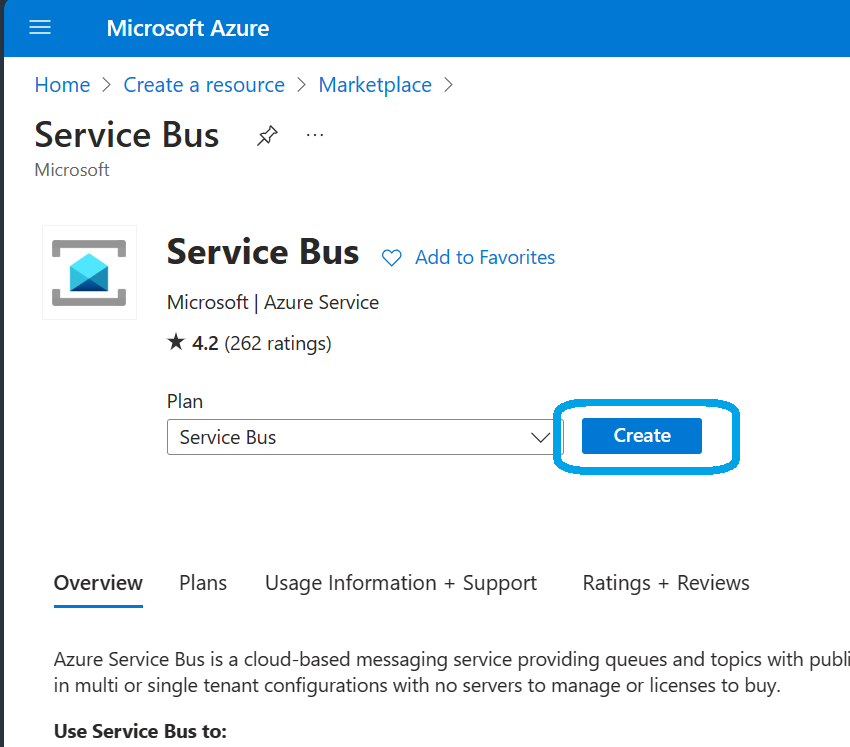
Next review the details and click 'Create':
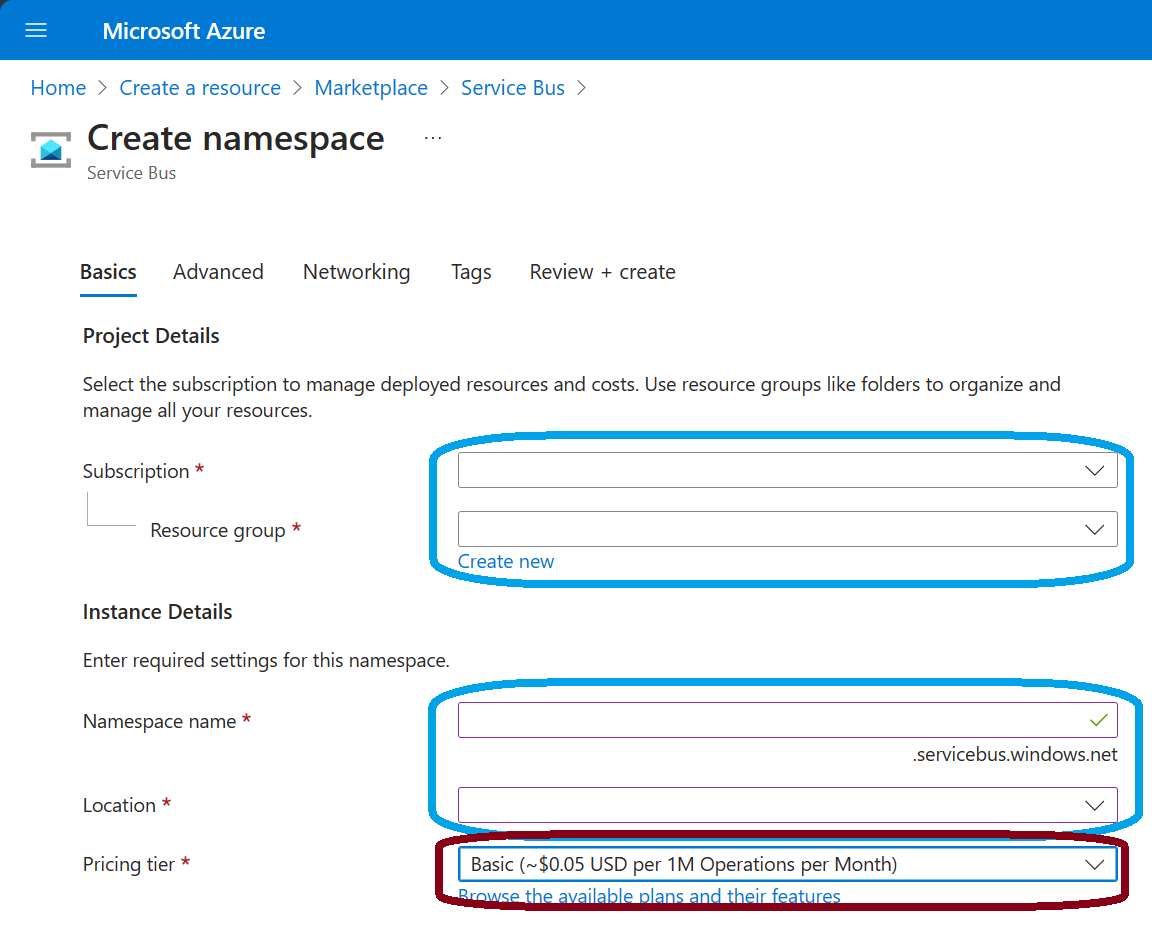
Next, you'll follow the creation wizard. Start by entering you're Azure Subscription and the new/existing Resource Group the Namespace will live in.
Then, enter the Namespace name to use. This will become the name of the Service Bus and part of your connection string.
Also, select your local region to deploy the Service Bus Namespace.
Finally, select a pricing tier from the available options detailed here ⇒ Pricing Tiers - Service Bus
I've chosen 'Basic' to get us started, but feel free to go wild! Keep in mind 'Basic' will only let us create Queues, but we can upgrade later.
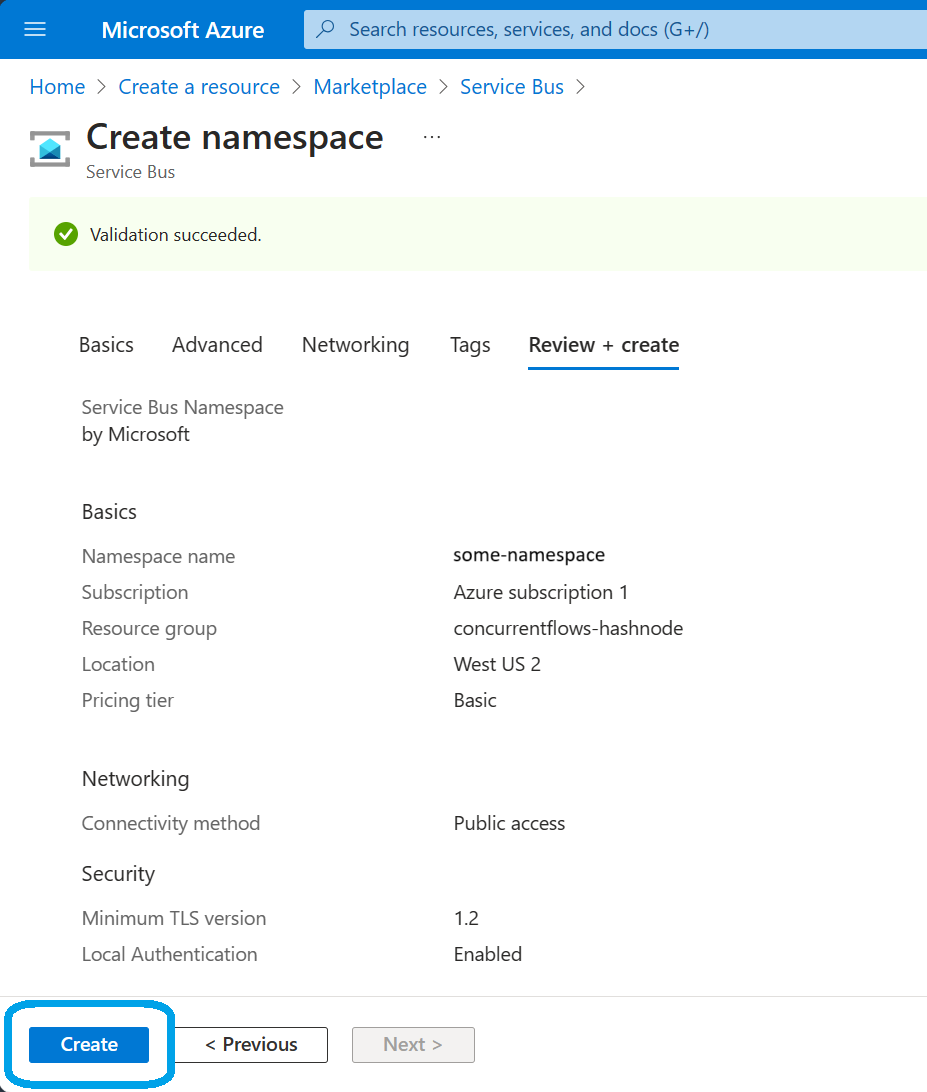
We'll skip across some nuance by clicking 'Review + Create'. This is where you'll see a summary of what you entered and what will be deployed. When you're satisfied with your selections, click 'Create':
Wait for the deployment to complete, once it's done, you can view the Resource Overview seeing the details of your shiny new Service Bus! I've removed some of my details 😉
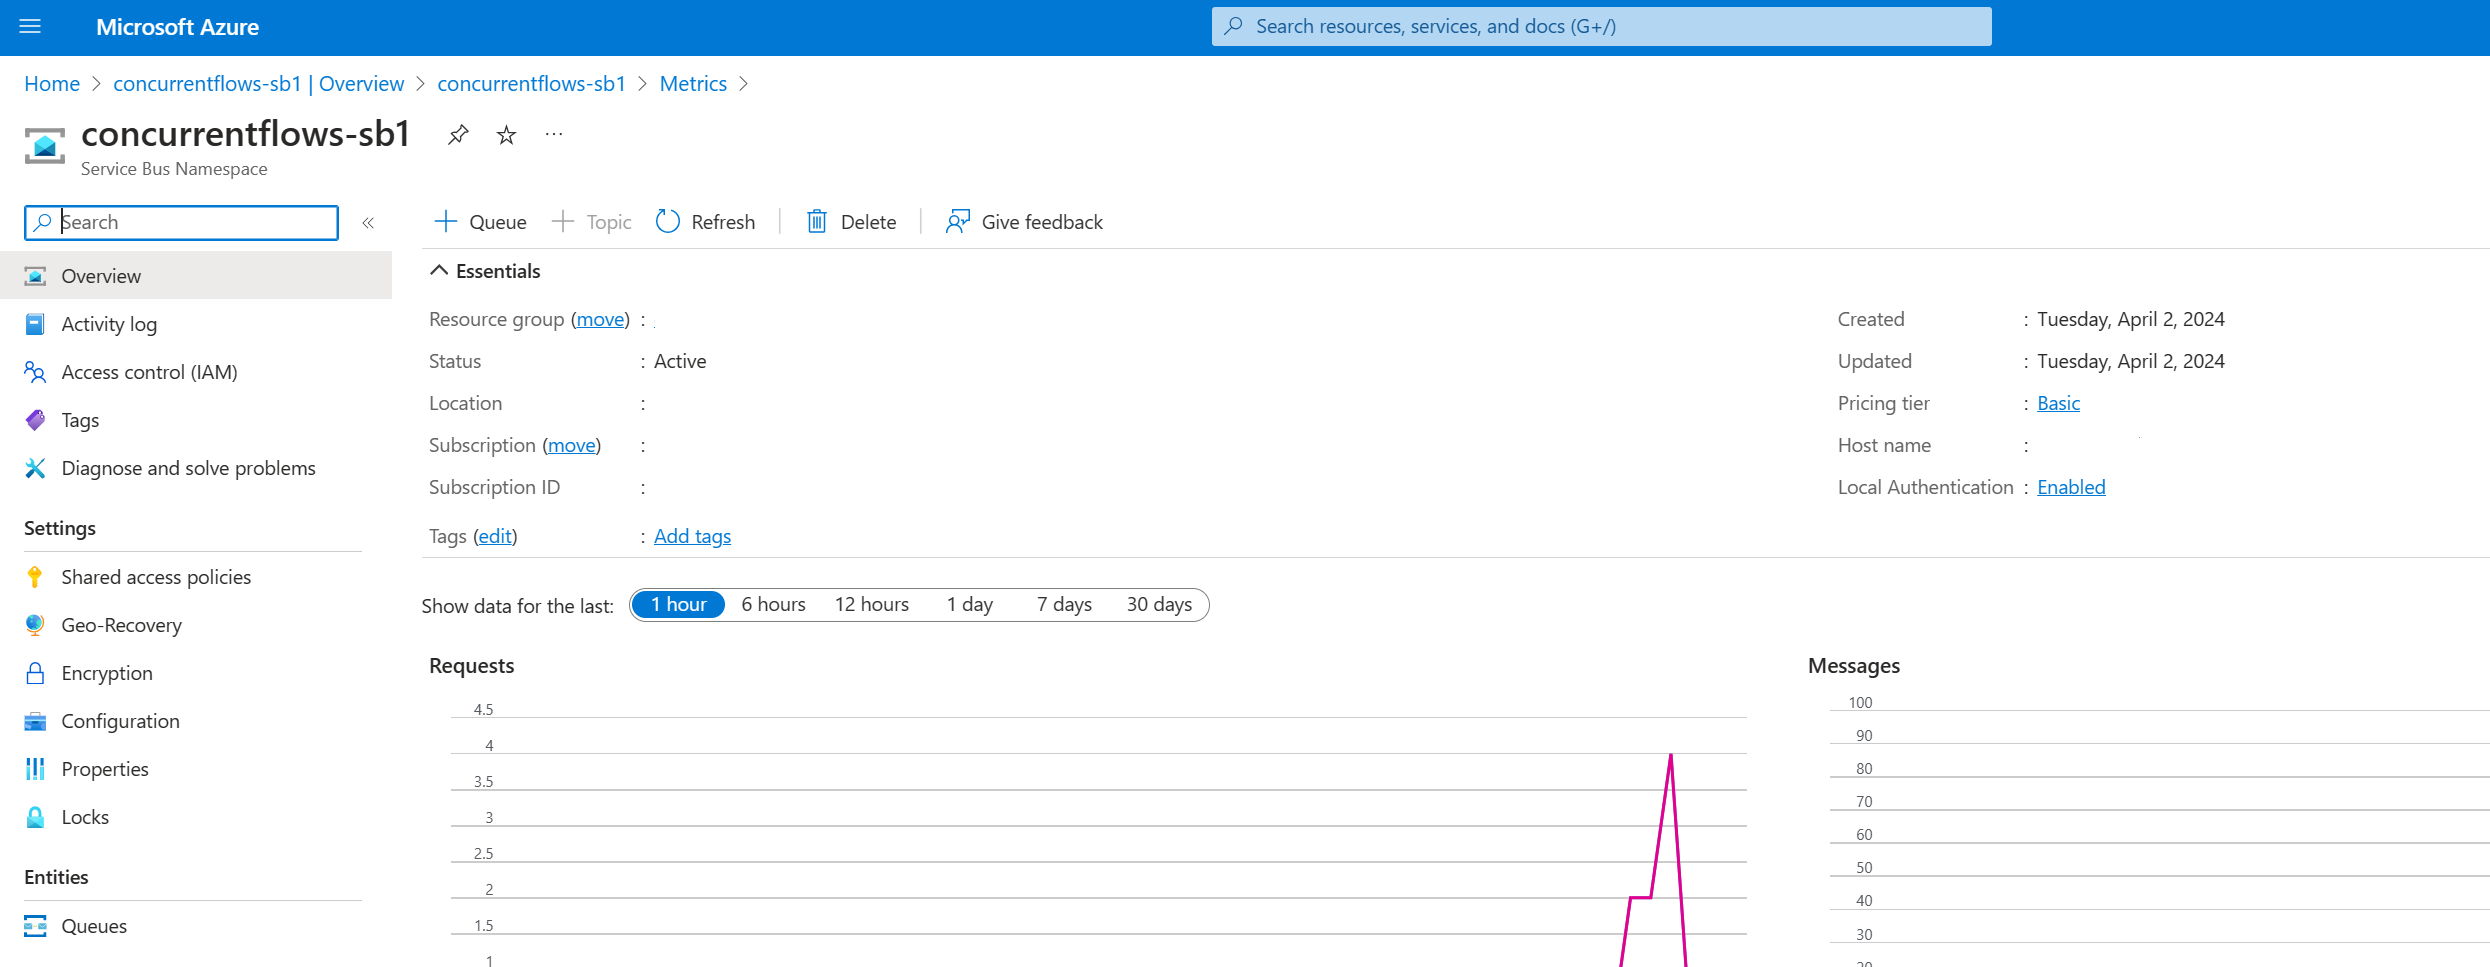
And that's it, you now have a Service Bus Namespace!!!
Create a Queue
In Service Bus you have Queues and Topics. Queues are First-In-First-Out, FIFO, and each message will be delivered to one single consumer. A Topic though, has a set of Subscriptions and each Subscription acts as a FIFO Queue. This lets Topics implement Fan-Out or Pub/Sub. We'll get into more options, settings and nuance later but that's the basics.
To make our Namespace a bit more useful we'll start with a simple Queue. Select either '+ Queue' at the top or from the left ribbon:

A creation dialog will appear where you can configure your new Queue. Enter a Name, select the maximum queue size, TTL, Lock Duration, etc. You'll see below I've set the following:
Max size to the minimum 1 GB
Max delivery count of 3
TTL reduced to 10 minutes
Lock duration of a quick 1 minute
And you can leave the final two check boxes unchecked
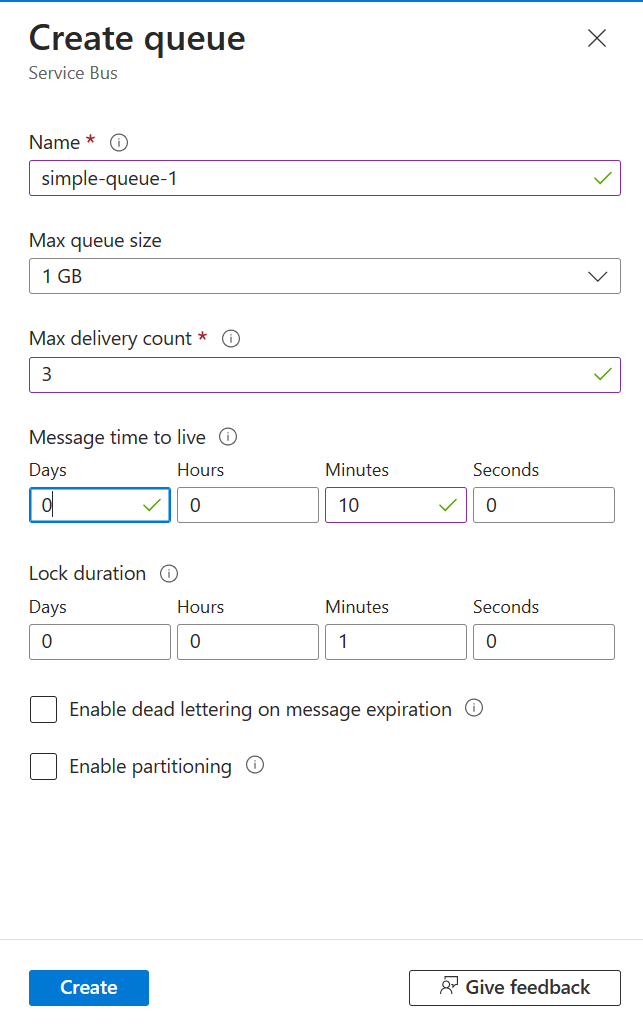
Click 'Create', and Boom! you now have a simple Queue!
First Message, From the Portal
For your first message, let's simply use the portal before we dive into code in the next post.
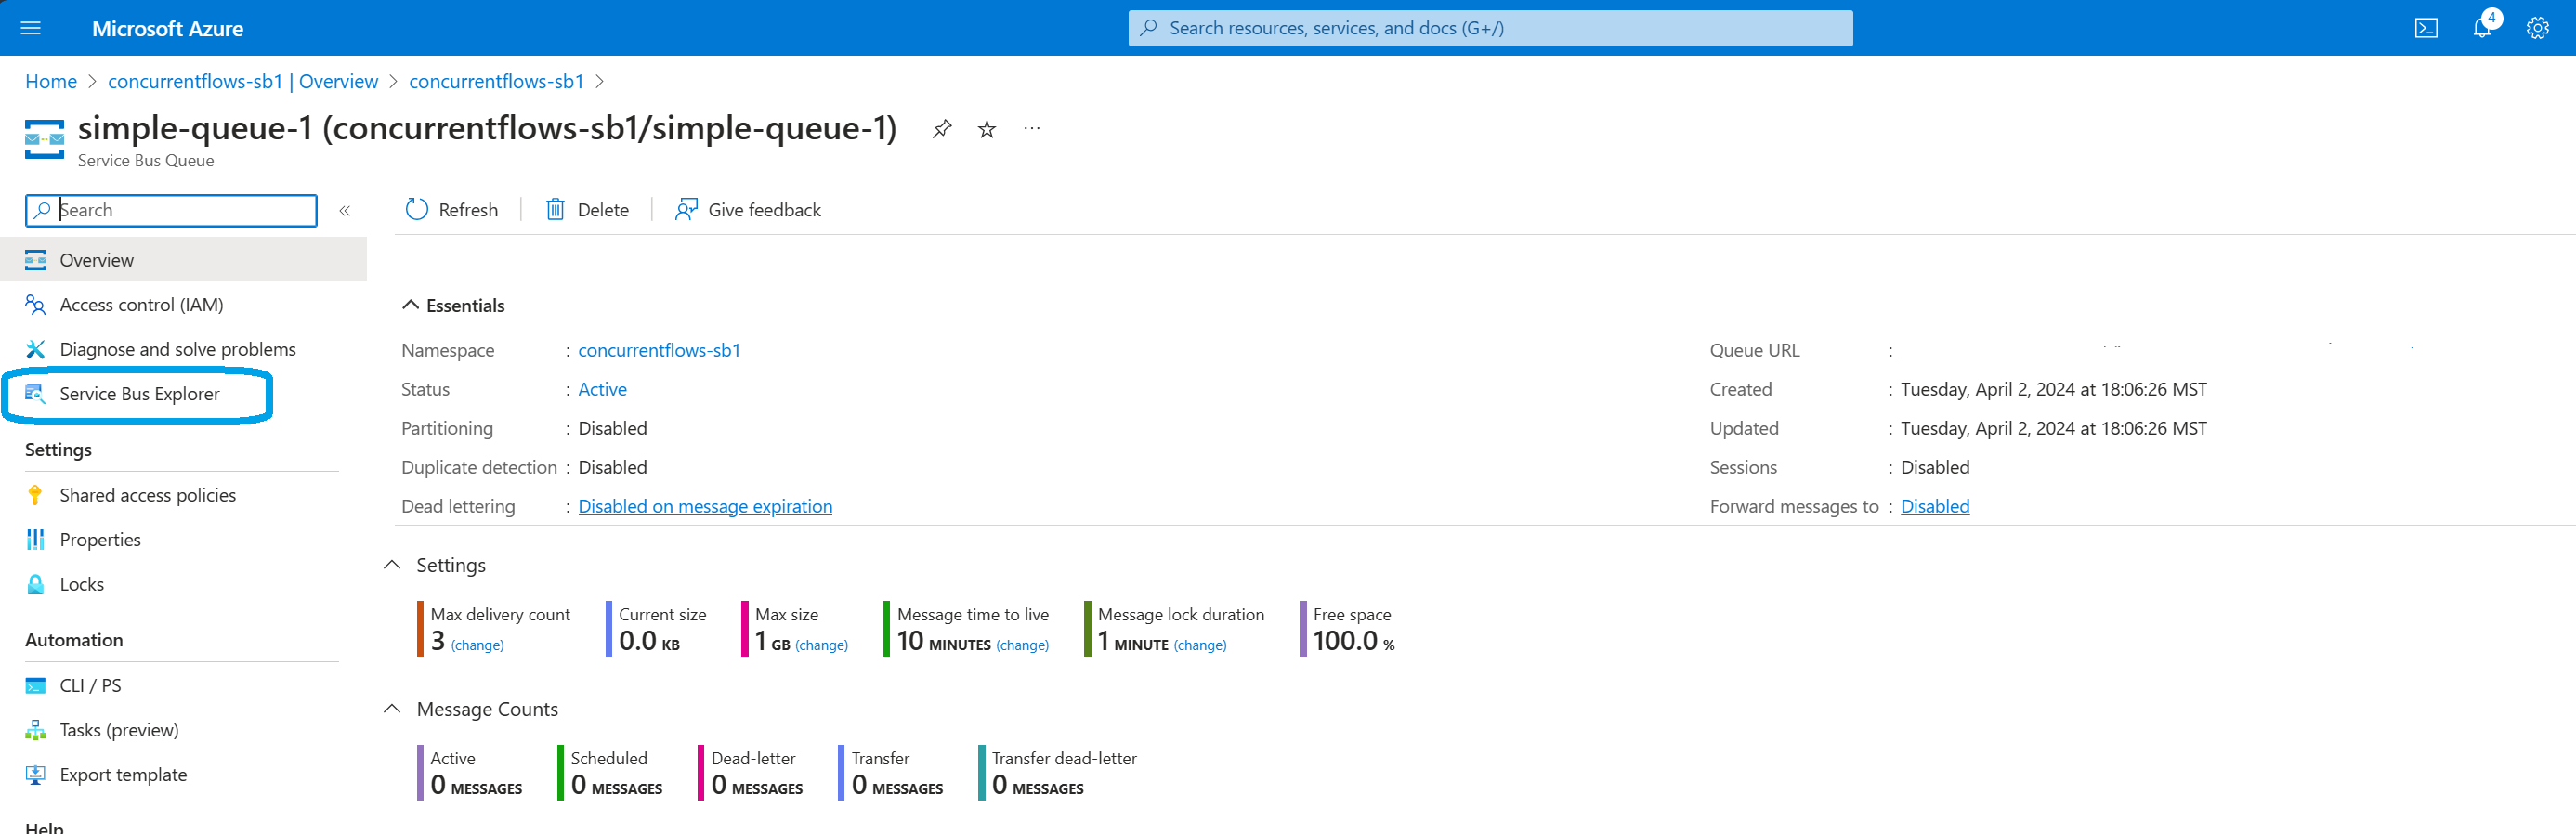
To send a message first open the details of your Queue by clicking on it from the Overview. From there, enter the 'Service Bus Explorer':
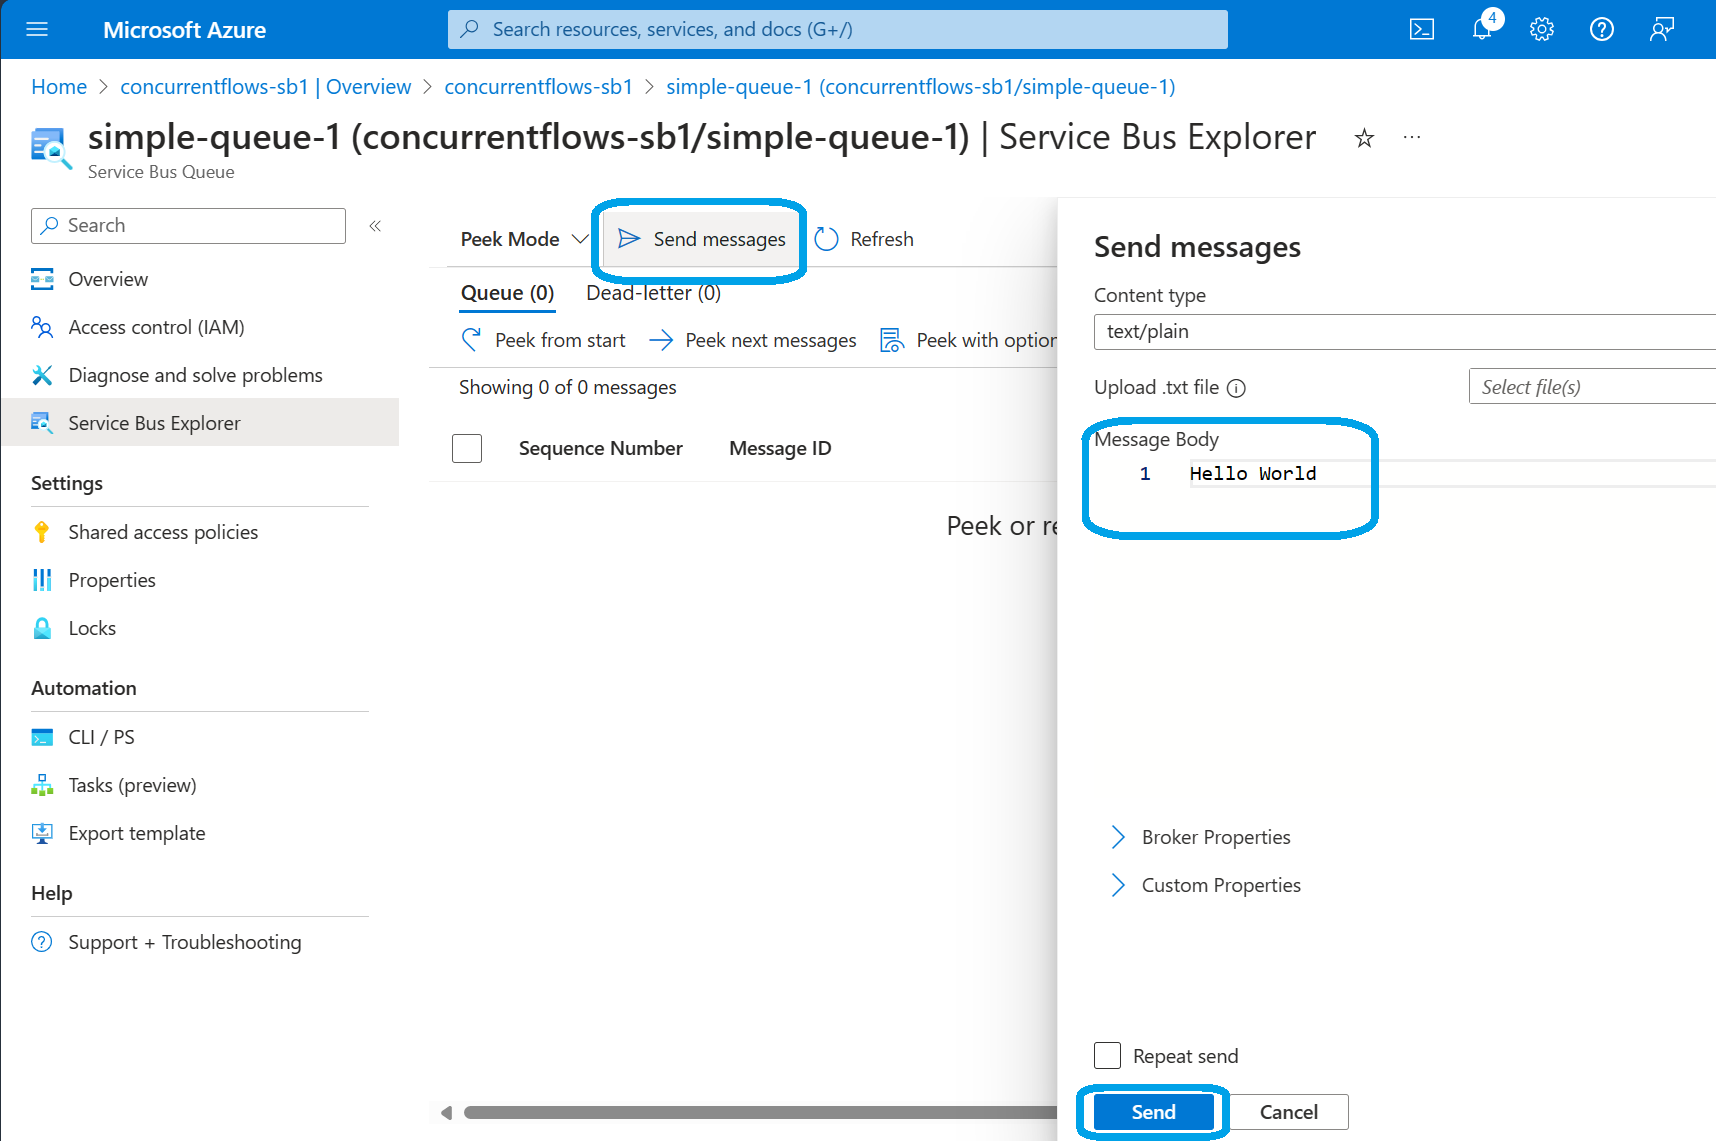
Once in the Explorer, click on 'Send messages'. From here you can send different content types, bodies, and set various properties. For the first one, let's send the classic 'Hello World' greeting:
Once you've clicked 'Send', set your Mode by clicking 'Peek Mode' and switch it to 'Receive Mode', then click on 'Receive messages'. Be sure to select 'ReceiveAndDelete' on the dialog that pops up.
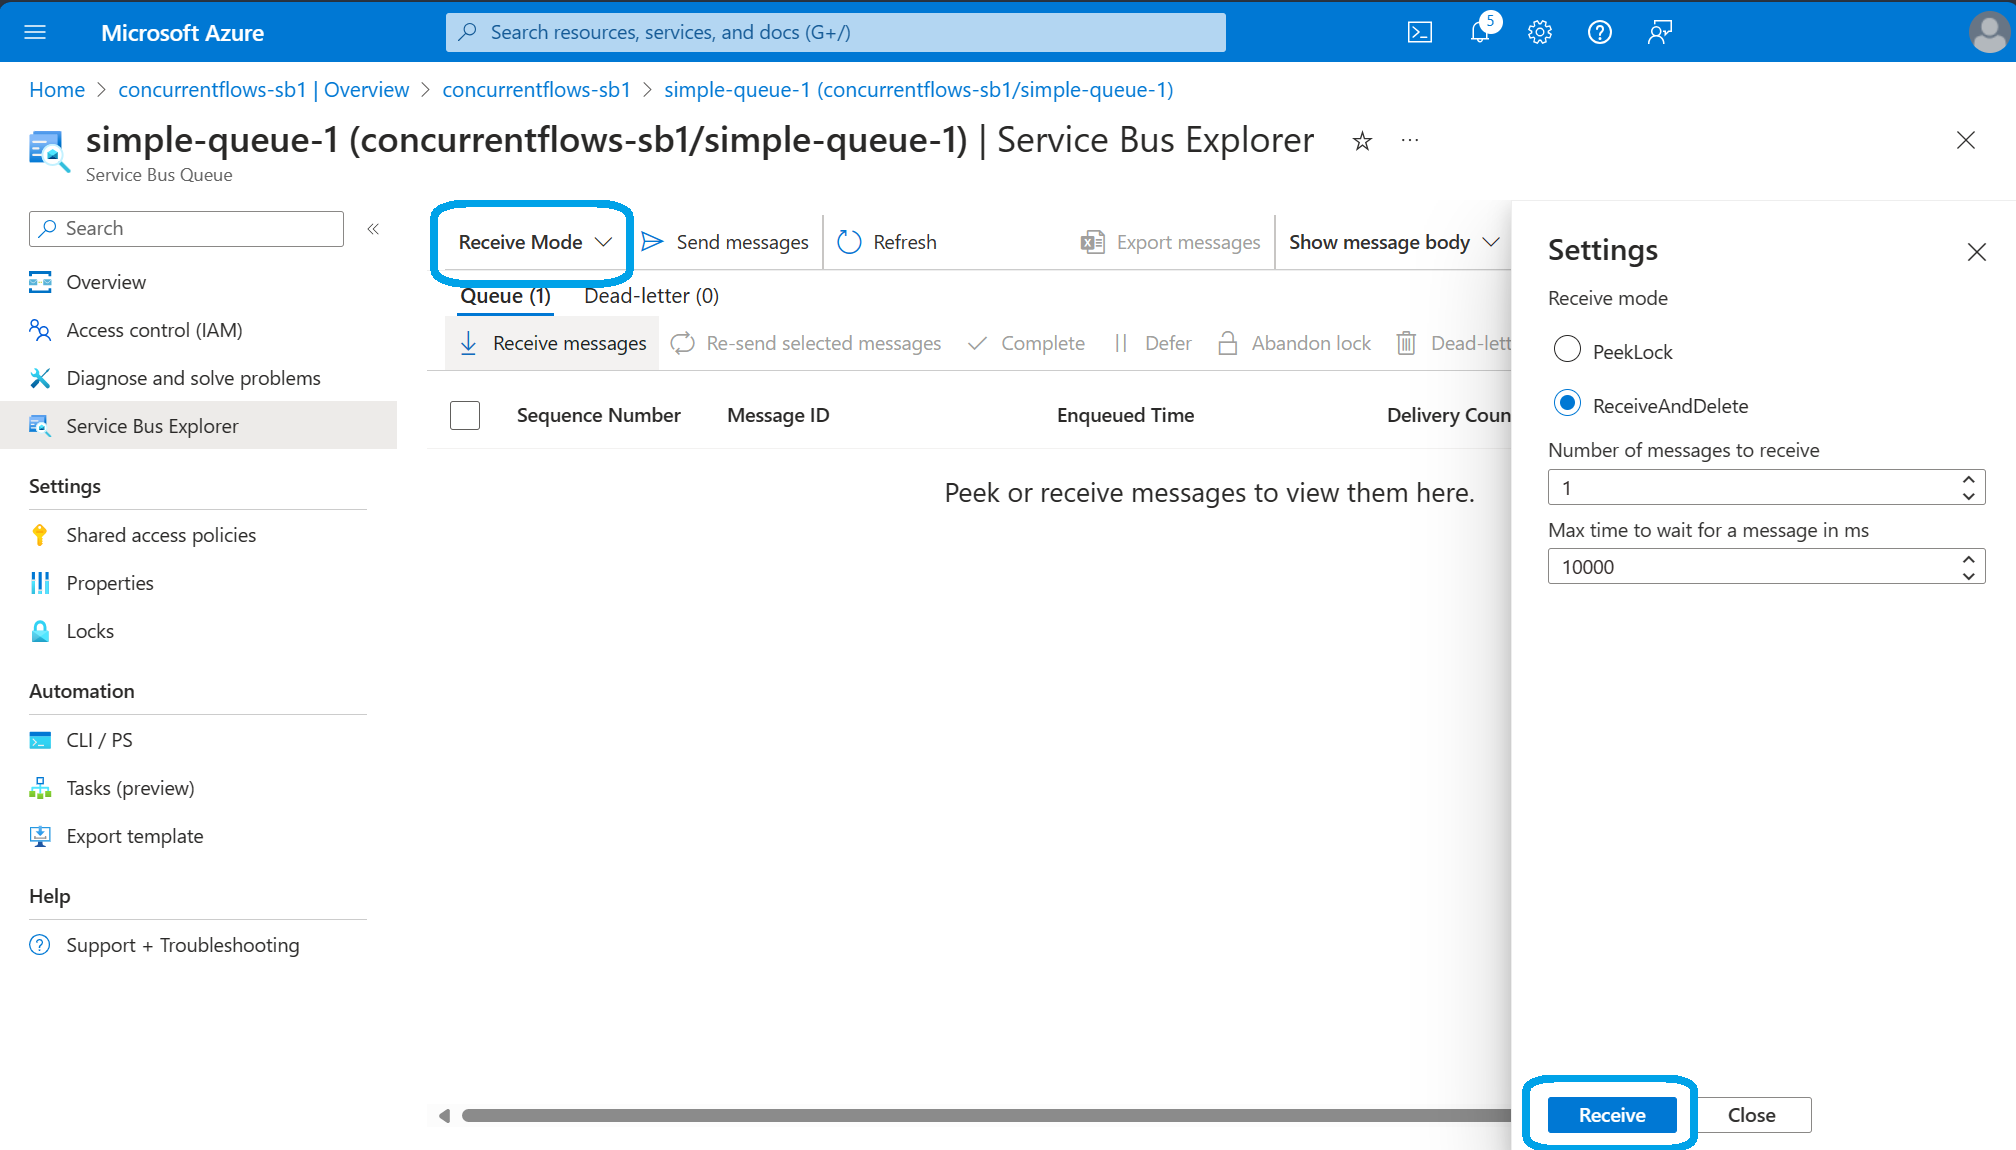
Finally click 'Receive' and you'll be greeted by your message in the kindest way!
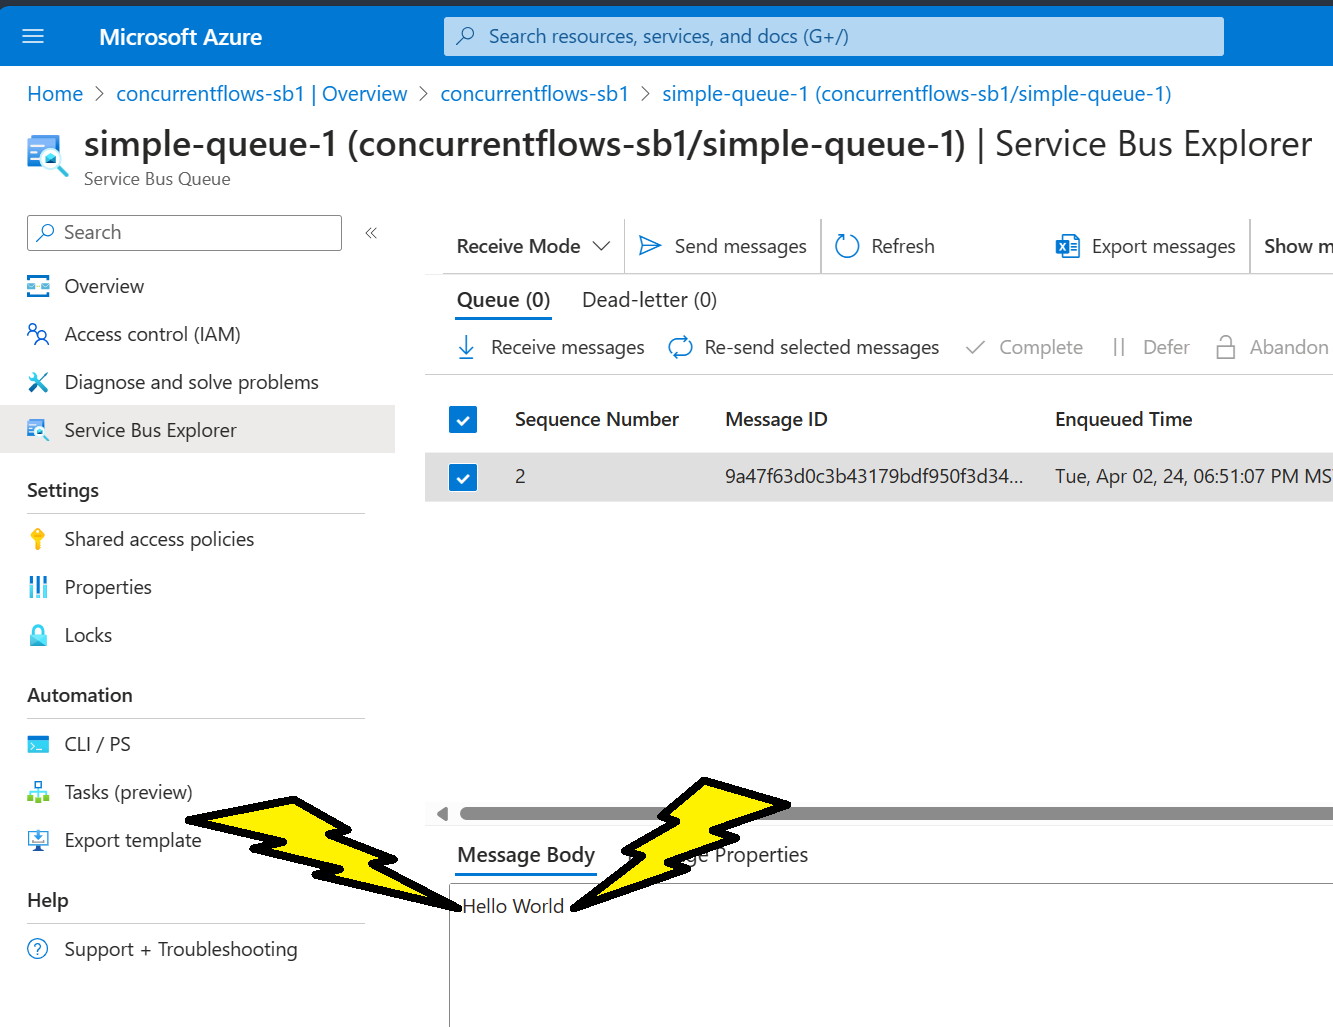
Don't you love that 'Paint' styling!?
Wrap Up
Quick and simple kickoff post; we created a Service Bus Namespace, created a Queue, finally sent and received a message on that Queue. Next we'll dive a layer deeper and start interacting with the Service Bus via a dotnet app.
If there's anything specific you'd like covered regarding Service Bus, please drop an ask in the comments!